In the new compensation module (ECM 5.0 and above), SAP introduced an enhnced functionality to job market survey. Unlike the previous version where you have very little functionality and only a couple of infotypes, this new version add a few more bell and whistle to the mix.
You can read more about it at their help files @ http://help.sap.com or click HERE.
Before we being, the assumption is you have a proper job catalog created in SAP and all of them are properly mapped in IT1005 and job grouping.
With that, you can access the job survey functionality from the main SAP menu
SAP Menu -> Human Resources -> Personnel Management -> Compensation Management -> Enterprise Compensation Management -> Job Pricing -> Start Job Pricing
- OR -
Access it directly via transaction "PECM_START_JPR_BSP"
You will see the screen as followed:
We will quickly go over the at an highlevel the process on doing job survey starting from the top like downward.
I. PROVIDER DATA
- In this section you will be creating the provider profile. If you receive file from Tower Perrins, Mercer, Salary.COM, or any other provider, you will start with creating a profile for them here. See below.
II. IMPORT DATA
- Once you have created the provider profile, you will start to import the job survey catalog. SAP requires you to do three separated upload in a text tab delimited ASCII format file. The 3 files are:
- Job Catalog
- Job Description
- Market Data
Each of the file will upload to the corresponding infotype(s) on the R/3 side. Further explanation could be found HERE. The available fields to be mapped on the upload and explanation could be found HERE. Note: The Job Code and Job Level fields will be found across all three upload file. This is the primary key used to link the three upload together.
Section II-A: Job Catalog upload, you will need to provide these values in the upload process. Refer back to HERE for further field explanation
In the first screen, you select the upload type and upload file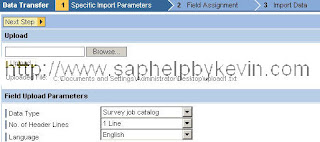
In the second screen, you will match up the upload file fields against the fields available in SAP. At this point, you can click on "SAVE FIELD MAPPING", so you wouldn't have to remap future upload. The third and final screen in this process will show the successful uploaded data for you review.
Don't forget to click on "SAVE IMPORT DATA" when you are done. The upload will not COMMIT to the database until then.
Section II-B: Job Description upload, you will need to provide these values in the upload Refer back to HERE for further field explanation
Similar to Section II-A above, you will be guided through 3 separated screens process. The final result of this section should look as followed.
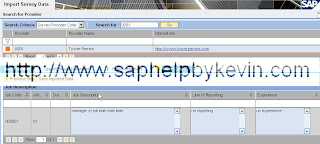
Don't forget to click on "SAVE IMPORT DATA" when you are done. The upload will not COMMIT to the database until then.
Section II-C: Market Survey upload, you will need to provide these values in the upload
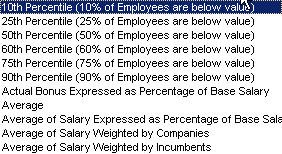
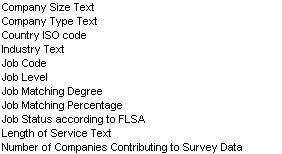
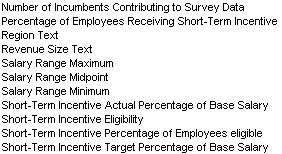
 Refer back to HERE for further field explanation
In the first screen, you will be presented with additional fields when selecting Market Data to upload, see screenshot.
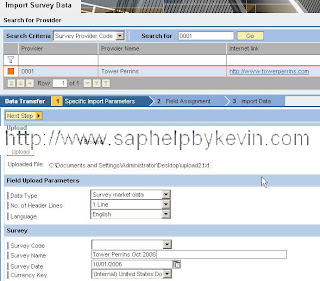
NOTE: Follow the same procedure to import survey market data. However, when you select this option, additional fields are displayed. If you have previously imported survey market data, these fields will be filled with this information; if not, these fields will be empty. You must enter a Survey Name and Survey Date. This date will subsequently be used in “aging” your survey data. In addition, you must enter the currency of the imported amount fields
Upon completing the mapping, the final result should look as followed
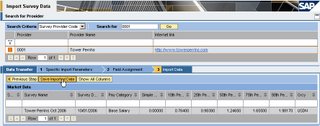
Once you have successfully upload all of the information, you've completed 1/2 of the hard labor.
No comments:
Post a Comment